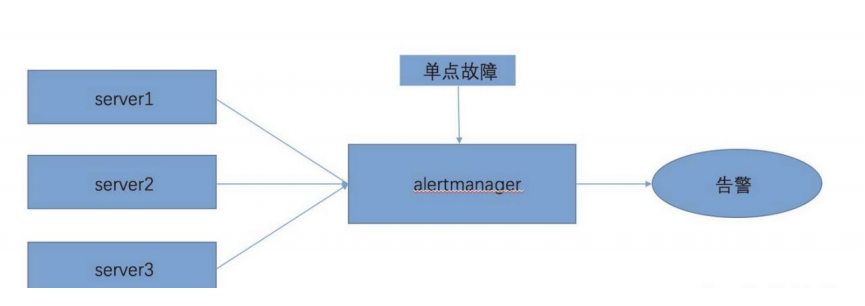
5.7:alertmanager 高可用 5.7.1:单机: 大部分使用alertmanager组件的时候,都是用的单点架构,架构图如下图
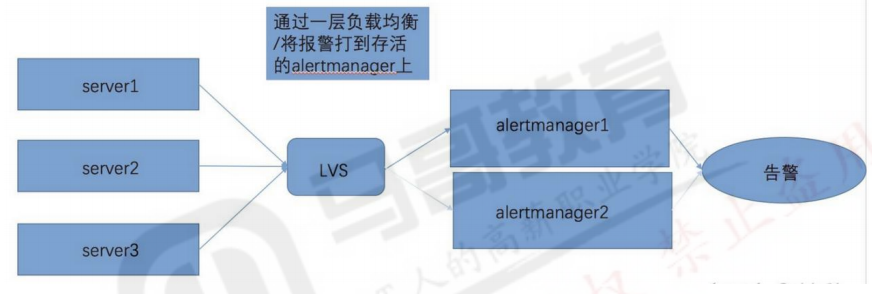
5.7.2:基于负载均衡:
5.7.3:基于 Gossip 机制: https://yunlzheng.gitbook.io/prometheus-book/part-ii-prometheus-jin-jie/readmd/alertmanager-high-availability
1
2
3
4
5
Alertmanager 引入了 Gossip 机制。Gossip 机制为多个 Alertmanager 之间提供了信息传递的机制。确保及时在多个 Alertmanager 分别接收到相同告警信息的情况下,并且只有一个告警通知被发送给 Receiver。 集群环境搭建: 为了能够让 Alertmanager 节点之间进行通讯,需要在 Alertmanager 启动时设置相应的参数。其中主要的参数包括: --cluster.listen-address string: 当前实例集群服务监听地址 --cluster.peer value: 初始化时关联的其它实例的集群服务地址
1 PrometheusAlert 是开源的运维告警中心消息转发系统,支持主流的监控系统 Prometheus、Zabbix,日志系统 Graylog2,Graylog3、数据可视化系统 Grafana、SonarQube,阿里云-云监控,以及所有支持 WebHook接口的系统发出的预警消息,支持将收到的这些消息发送到钉钉,微信,email,飞书,腾讯短信,腾讯电话,阿里云短信,阿里云电话,华为短信,百度云短信,容联云电话,七陌短信,七陌语音,TeleGram,百度 Hi(如流)等。
https://github.com/feiyu563/PrometheusAlert
六:pushgateway: https://github.com/prometheus/pushgateway
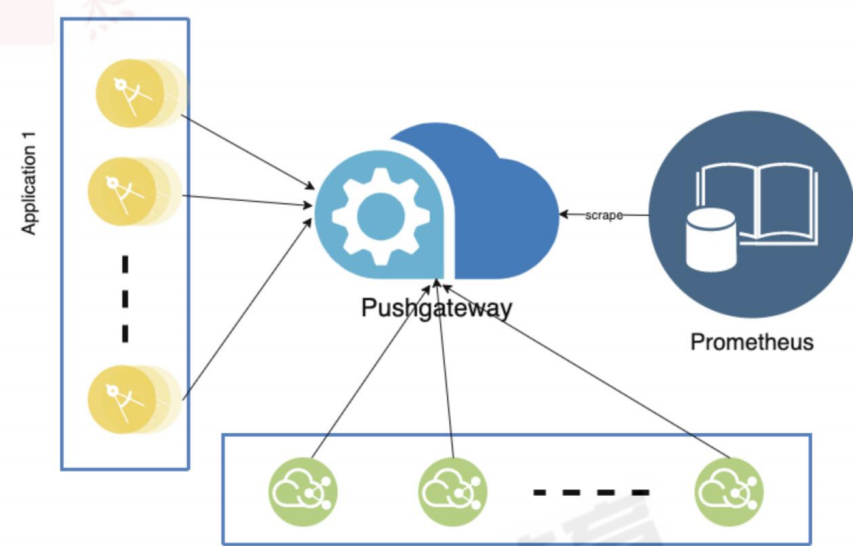
6.1:pushgateway 简介: 1 2 3 4 pushgateway 是采用被动推送的方式,而不是类似于 prometheus server 主动连接 exporter 获取监控数据。 pushgateway 可以单独运行在一个节点,然后需要自定义监控脚本把需要监控的主动推送给 pushgateway的 API 接口,然后 pushgateway 再等待 prometheus server 抓取数据,即 pushgateway 本身没有任何抓取监控数据的功能,目前 pushgateway 只是被动的等待数据从客户端推送过来。 --persistence.file="" #数据保存的文件,默认只保存在内存中 --persistence.interval=5m #数据持久化的间隔时间
6.2:部署 pushgateway: 1 2 3 4 5 6 7 8 9 10 11 12 13 lrwxrwxrwx 1 root root 29 Oct 13 14:22 pushgateway -> pushgateway-1.4.3.linux-amd64 LISTEN 0 128 *:9091 *:* users :(("pushgateway" ,pid=5125,fd=3))
6.3:prometheus 到 pushgateway 采集数据: 6.3.1:验证 pushgateway: pushgateway自身带有metrics指标
6.3.2:prometheus 配置数据采集: 1 2 3 4 5 6 7 8 9 10 11 12 13 14 15 16 17 18 19 20 - job_name: 'pushgateway-monitor' scrape_interval: 5s static_configs: - targets: ['192.168.3.60:9091' ] honor_labels: true Checking prometheus.yml SUCCESS: 2 rule files found SUCCESS: prometheus.yml is valid prometheus config file syntax 容器prometueus重新applyyaml文件 二进制prometheus重启服务(开启了热加载也可通过热加载方式生效)
6.3.3:验证数据:
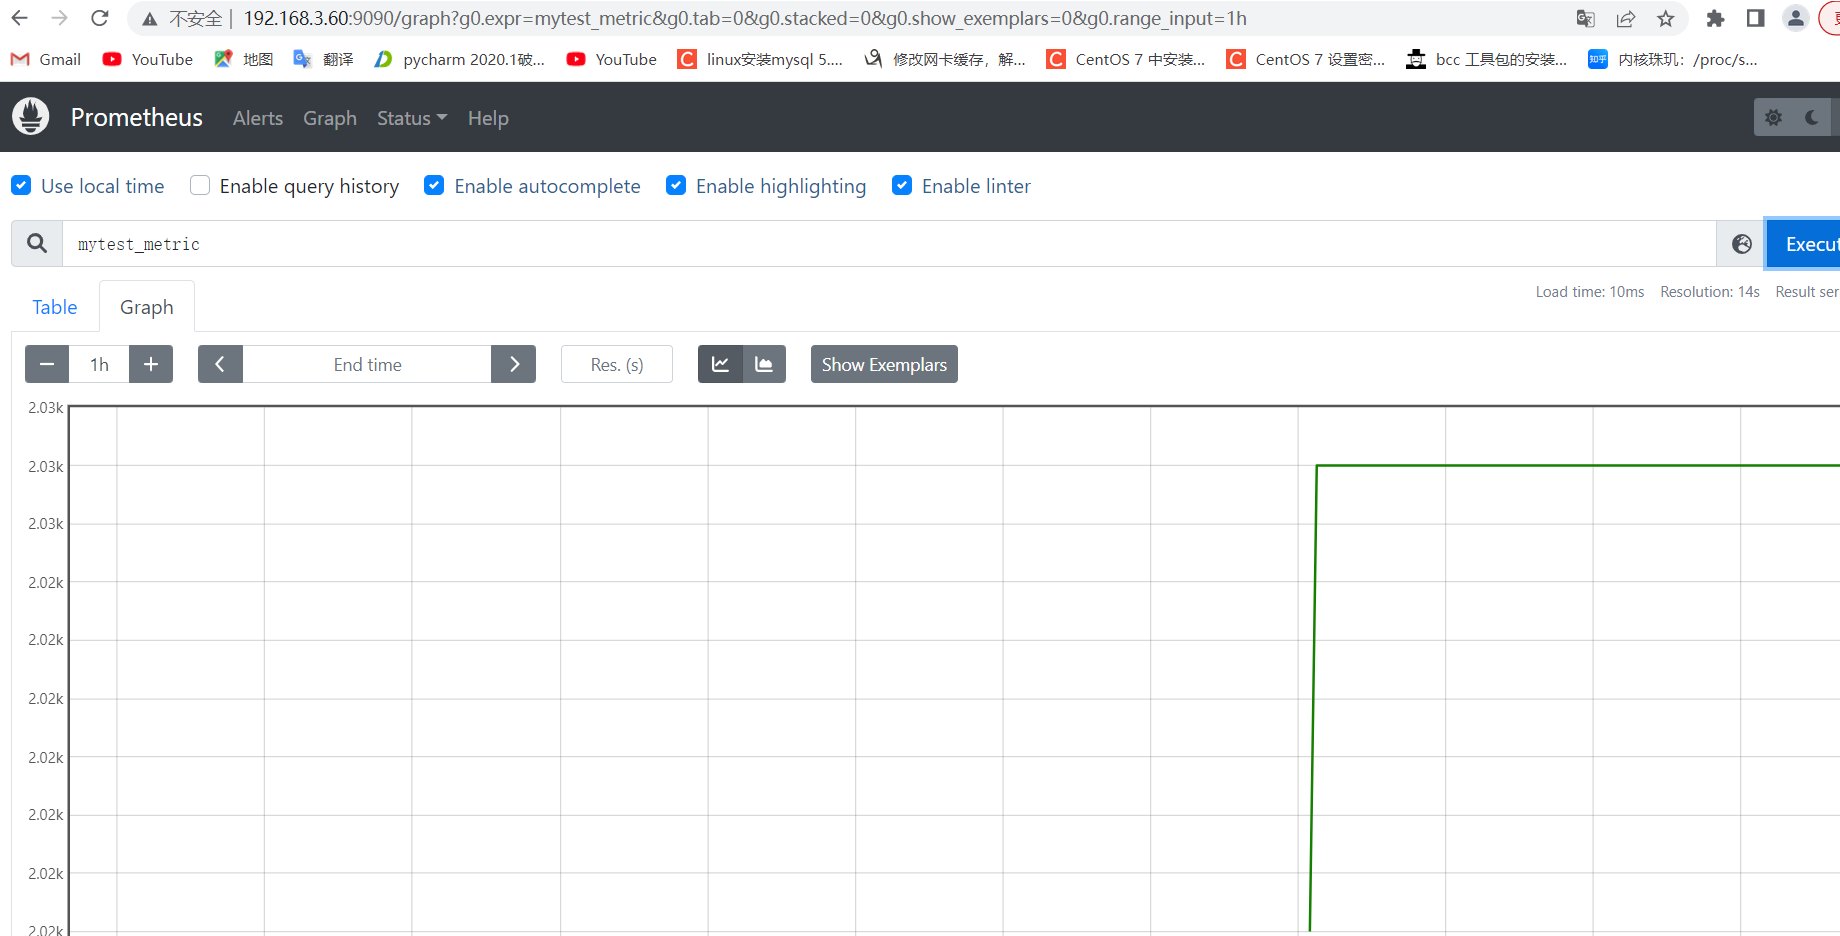
6.4:测试从客户端推送单条数据: 1 2 3 4 5 6 7 要 Push 数据到 PushGateway 中,可以通过其提供的 API 标准接口来添加,默认 URL 地址为: http://<ip>:9091/metrics/job/<JOBNAME>{/<LABEL_NAME>/<LABEL_VALUE>}, 其中<JOBNAME>是必填项,为 job 标签值,后边可以跟任意数量的标签对,一般我们会添加一个 instance/<INSTANCE_NAME>实例名称标签,来方便区分各个指标。 推送一个 job 名称为 mytest_job,key 为 mytest_metric 值为 2022
6.4.2:pushgateway 验证数据:
1 2 除了 mytest_metric 外,同时还新增了 push_time_seconds 和 push_failure_time_seconds 两个指标, 这两个是 PushGateway 自动生成的指标, 分别用于记录指标数据的成功上传时间和失败上传时间。
6.5:测试从客户端推送多条数据: 6.5.1:推送多条数据: 1 2 3 4 5 6 node_memory_usage 4311744512 node_memory_total 103481868288 EOF
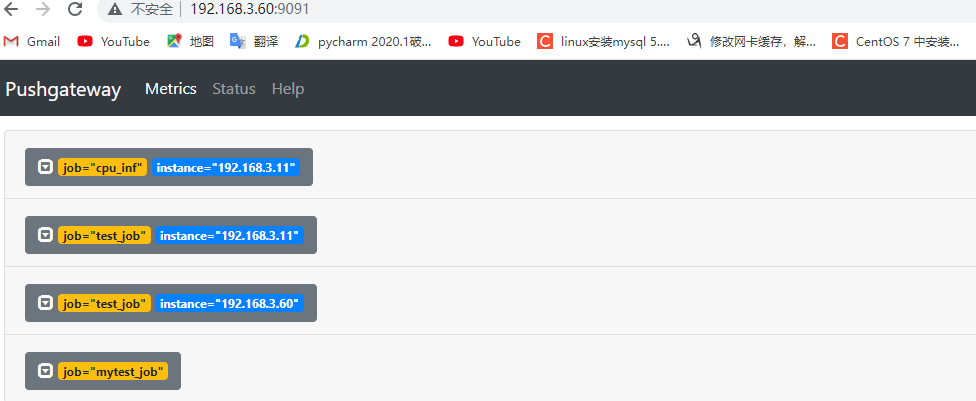
6.5.2:pushgateway 验证数据:
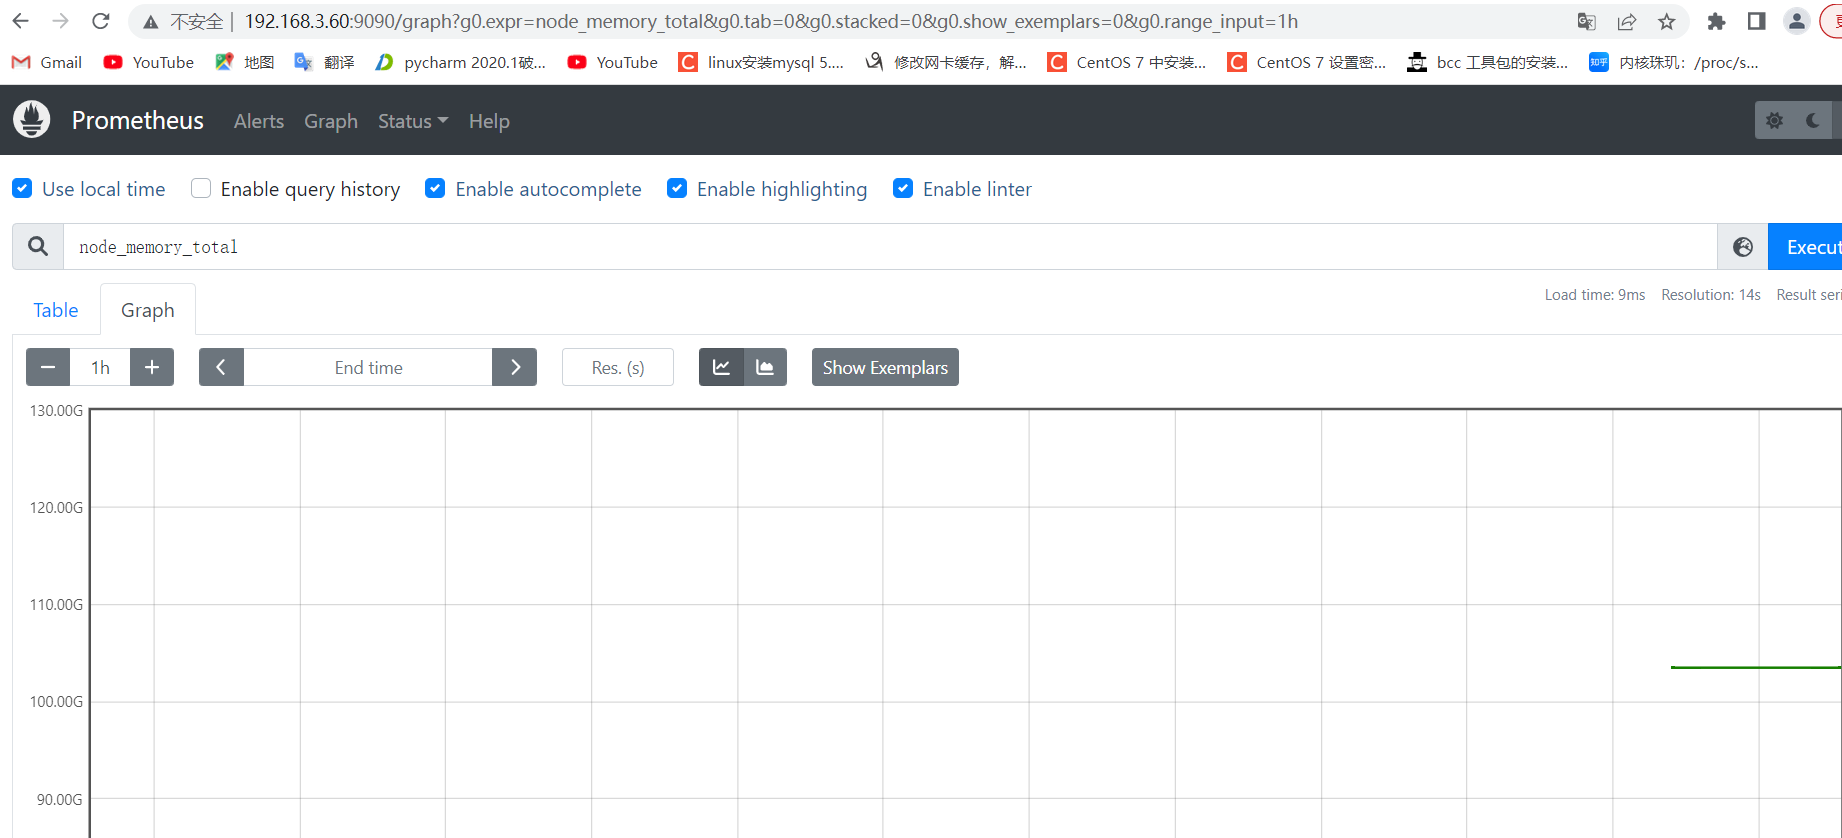
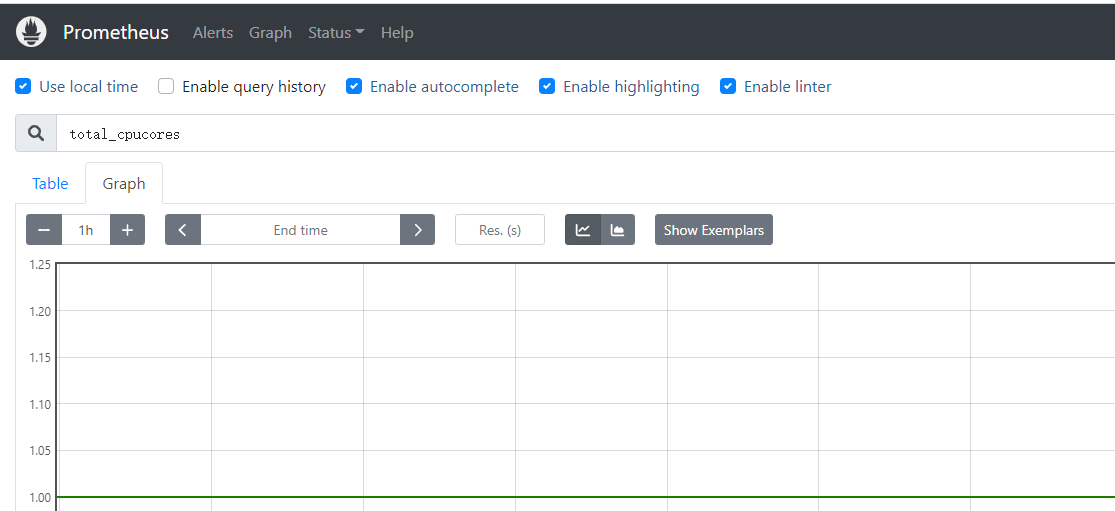
6.5.3:prometheus server 验证数据:
6.6:自定义收集数据: 1 2 3 4 5 6 7 8 9 10 11 12 13 14 total_memory=$(free |awk '/Mem/{print $2}' ) used_memory=$(free |awk '/Mem/{print $3}' ) job_name="custom_memory_monitor" instance_name=`ifconfig ens33 | grep -w inet | awk '{print $2}' ` pushgateway_server="http://192.168.3.60:9091/metrics/job" cat <<EOF | curl --data-binary @- ${pushgateway_server}/${job_name}/instance/${instance_name} #TYPE custom_memory_total gauge custom_memory_total $total_memory #TYPE custom_memory_used gauge custom_memory_used $used_memory EOF 分别在不同主机执行脚本,验证指标数据收集和推送:
6.6.2:pushgateway 验证数据:
6.6.3:prometheus 验证数据:
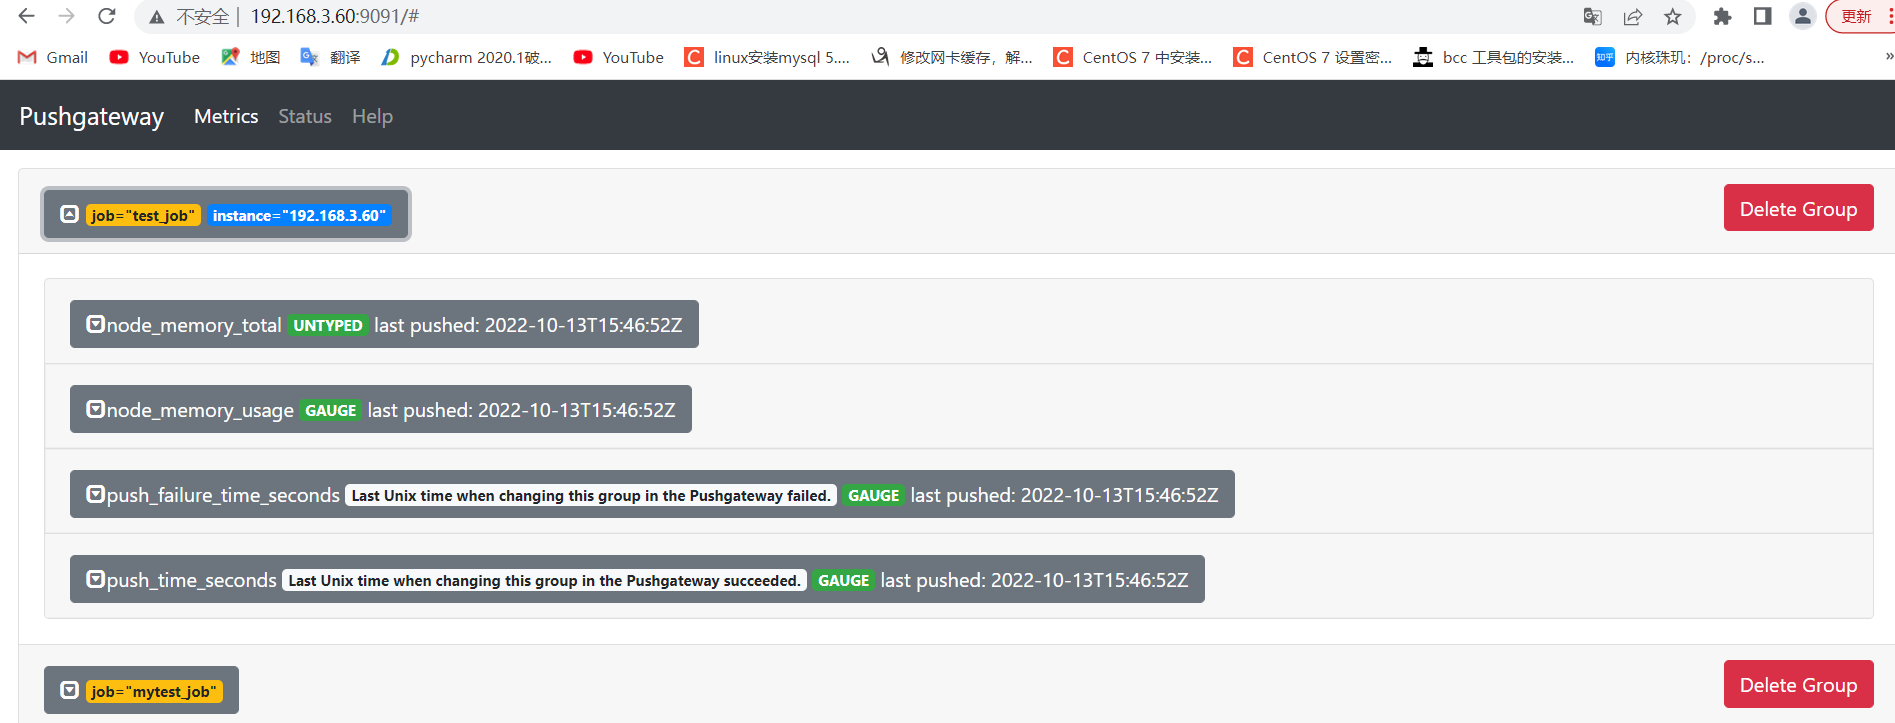
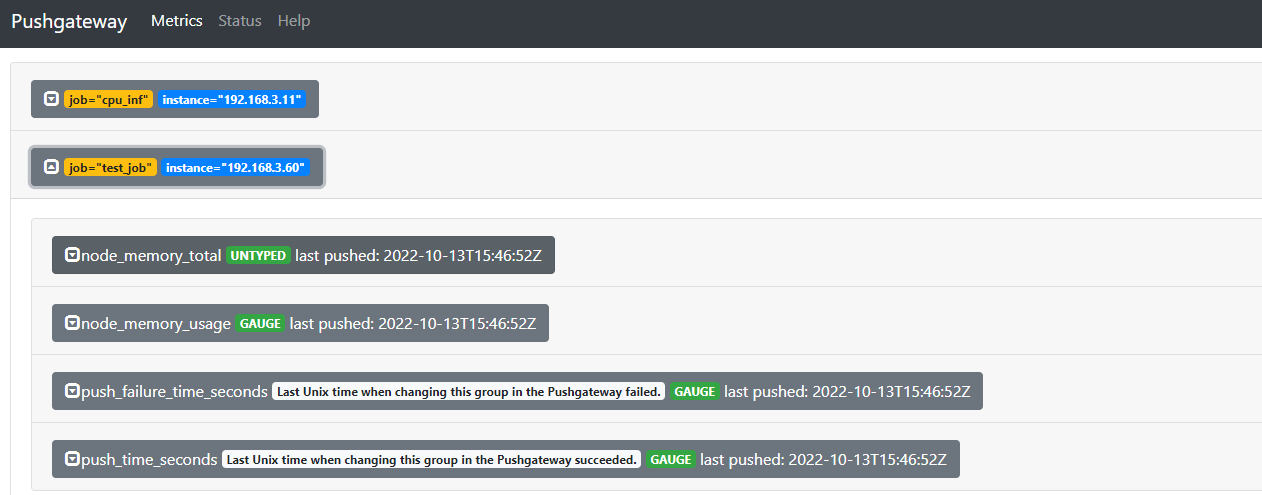
6.7:删除数据: 先对一个组写入多个 instance 的数据:
1 2 3 4 5 6 7 8 9 10 11 12 node_memory_usage 4311744512 node_memory_total 103481868288 EOF node_memory_usage 4311744512 node_memory_total 103481868288 EOF
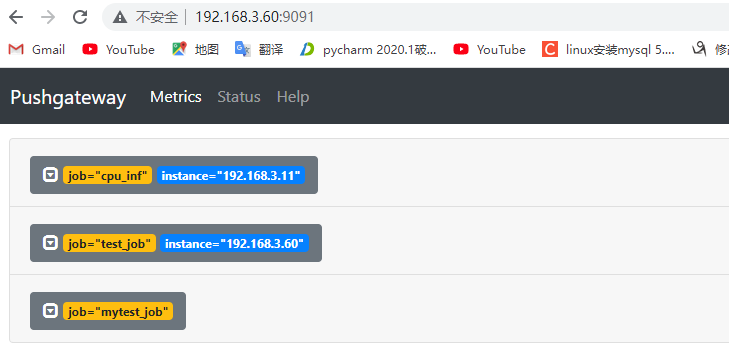
6.7.1:通过 API 删除指定组内指定实例的数据: 1 curl -X DELETE http://192.168.3.60:9091/metrics/job/test_job/instance/192.168.3.11
七.prometheus 联邦: Prometheus Server 环境:
1 2 3 4 5 6 192.168.3.60 192.168.3.70 192.168.3.71 192.168.3.70 192.168.3.71
7.1:部署 prometheus server:
Prometheus 主 server 和 prometheus 联邦 server 分别部署 prometheus
1 2 3 4 5 6 7 8 9 10 11 12 13 14 15 16 17 18 19 20 21 22 23 24 25 26 /apps '/apps/prometheus' -> '/apps/prometheus-2.32.1.linux-amd64' prometheus.yml prometheus promtool ./promtool check config prometheus.yml Checking prometheus.yml SUCCESS: 0 rule files found [Unit] Description=Prometheus Server Documentation=https://prometheus.io/docs/introduction/overview/ After=network.target [Service] Restart=on-failure WorkingDirectory=/apps/prometheus/ ExecStart=/apps/prometheus/prometheus --config.file=/apps/prometheus/prometheus.yml [Install] WantedBy=multi-user.target
7.2:部署 node_exporter: Node 节点(被监控节点)分别部署 node_exporter(exporter)
1 2 3 4 5 6 7 8 9 10 11 12 13 '/apps/node_exporter' -> '/apps/node_exporter-1.3.1.linux-amd64' [Unit] Description=Prometheus Node Exporter After=network.target [Service] ExecStart=/apps/node_exporter/node_exporter [Install] WantedBy=multi-user.target node-exporter.service
7.3:配置联邦 server 监控 node_exporter: 分别在联邦节点 1 监控 node1,在联邦节点 2 监控 node2
1 2 3 4 5 6 Prometheus 联邦节点 1: - job_name: "prometheus-node1" static_configs: - targets: ["192.168.3.70:9100" ]
验证数据:
1 2 3 4 5 6 Prometheus 联邦节点 2: # vim /apps/prometheus/prometheus.yml - job_name: "prometheus-node2" static_configs: - targets: ["192.168.3.71:9100"] # systemctl restart prometheus.service
7.4:prometheus server 采集联邦 server: 1 2 3 4 5 6 7 8 9 10 11 12 13 14 15 16 17 18 19 20 21 22 23 24 25 26 27 28 29 30 - job_name: "prometheus" static_configs: - targets: ["localhost:9090" ] - job_name: 'prometheus-federate-3.70' scrape_interval: 10s honor_labels: true metrics_path: '/federate' params: 'match[]' : - '{job="prometheus"}' - '{__name__=~"job:.*"}' - '{__name__=~"node.*"}' static_configs: - targets: - '192.168.3.70:9090' - job_name: 'prometheus-federate-3.71' scrape_interval: 10s honor_labels: true metrics_path: '/federate' params: 'match[]' : - '{job="prometheus"}' - '{__name__=~"job:.*"}' - '{__name__=~"node.*"}' static_configs: - targets: - '192.168.3.71:9090'
7.5:验证 prometheus server:
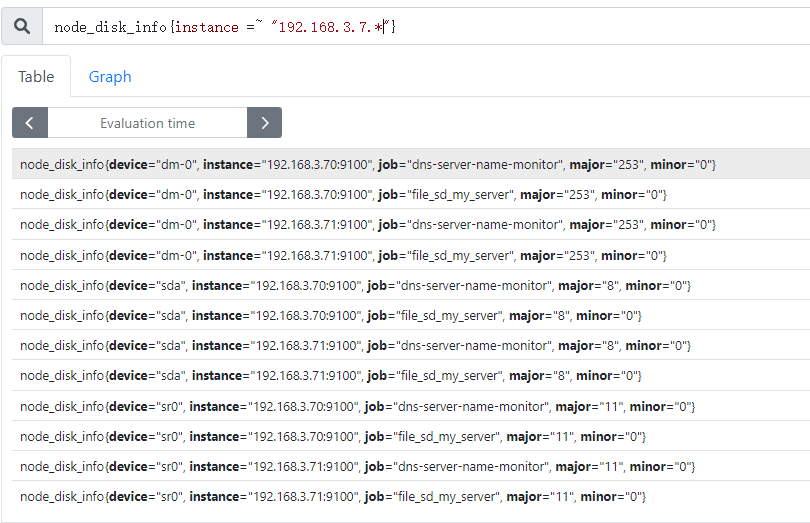
7.5.1:验证数据收集状态:
八:prometheus 存储系统: 1 Prometheus 有着非常高效的时间序列数据存储方法,每个采样数据仅仅占用3.5byte 左右空间,上百万条时间序列,30 秒间隔,保留 60 天,大概 200 多 G空间(引用官方 PPT)。
8.1:prometheus 本地存储简介:
1 默认情况下,prometheus 将采集到的数据存储在本地的 TSDB 数据库中,路径默认为 prometheus 安装目录的 data 目录,数据写入过程为先把数据写入 wal 日志并放在内存,然后 2 小时后将内存数据保存至一个新的 block 块,同时再把新采集的数据写入内存并在 2 小时后再保存至一个新的 block 块,以此类推。
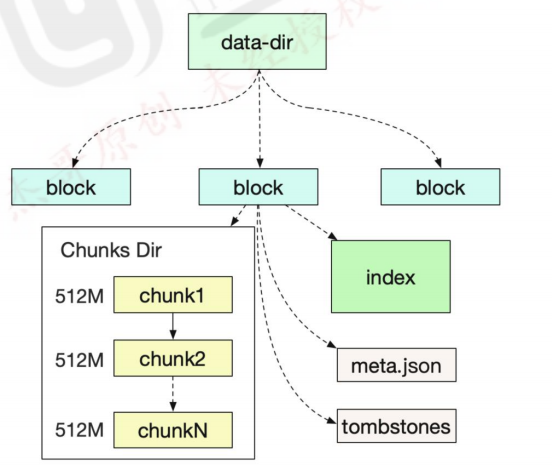
8.1.1:block 简介: 每个 block 为一个 data 目录中以 01 开头的存储目录,如下:
1 2 3 4 5 6 7 8 9 10 11 12 13 total 56 drwxr-xr-x 3 root root 4096 Oct 13 11:25 01GF8HESAM3BQPS2M08FMQH593 drwxr-xr-x 3 root root 4096 Oct 13 23:00 01GF9S6YSYAH0CJAX630TD76KS drwxr-xr-x 3 root root 4096 Oct 15 09:41 01GFDGA3AWGESPQ8EV2ACDXS5N drwxr-xr-x 3 root root 4096 Oct 15 11:00 01GFDMT051QE10E3YKYZR78C5Z drwxr-xr-x 3 root root 4096 Oct 15 11:00 01GFDMT2M3BVF8NSQHMXP02E28 drwxr-xr-x 3 root root 4096 Oct 15 13:00 01GFDVNQSG7SYGZNJRJW1KYJ2Z drwxr-xr-x 3 root root 4096 Oct 15 15:00 01GFE2HETG3X5VVV814PR40A3S drwxr-xr-x 2 root root 4096 Oct 15 15:00 chunks_head -rw-r--r-- 1 root root 0 Oct 15 14:13 lock -rw-r--r-- 1 root root 20001 Oct 15 15:50 queries.active drwxr-xr-x 3 root root 4096 Oct 15 15:00 wal
8.1.2:block 的特性: 1 block 会压缩、合并历史数据块,以及删除过期的块,随着压缩、合并,block 的数量会减少,在压缩过程中会发生三件事:定期执行压缩、合并小的 block 到大的 block、清理过期的块。
每个块有 4 部分组成:
1 2 3 4 5 6 7 8 ~ /apps/prometheus/data/01FQNCYZ0BPFA8AQDDZM1C5PRN/ ├── chunks │ └── 000001 ├── index ├── meta.json └── tombstones 样本。
8.1.3:本地存储配置参数: 1 2 3 4 5 6 7 8 9 10 --config.file="prometheus.yml" --web.listen-address="0.0.0.0:9090" --storage.tsdb.path="data/" --storage.tsdb.retention.size=B, KB, MB, GB, TB, PB, EB --storage.tsdb.retention.time= --query.timeout=2m -query.max-concurrency=20 --web.read-timeout=5m --web.max-connections=512 --web.enable-lifecycle
8.2:远端存储之–victoriametrics:
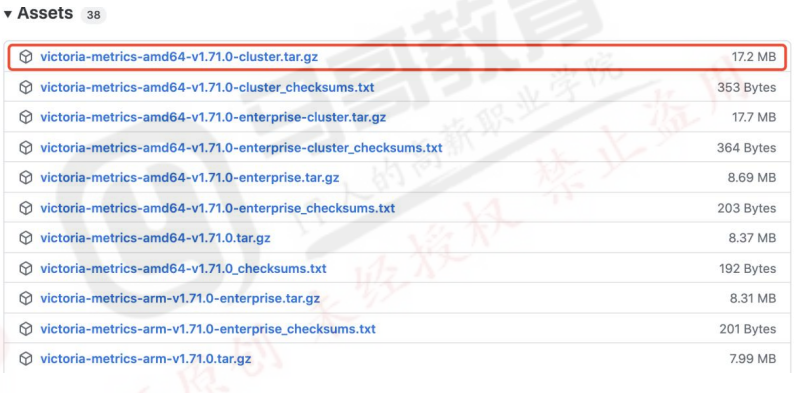
8.2.1:单机版部署: 下载单机的部署包 victoria-metrics-amd64-v1.71.0.tar.gz:
8.2.1.1:部署单机版: 1 2 3 4 5 6 7 8 9 10 11 12 13 14 15 16 17 18 19 20 21 参数: -httpListenAddr=0.0.0.0:8428 -storageDataPath 的 victoria-metrics-data 目录中。 -retentionPeriod 支持的单位有 h (hour), d (day), w (week), y (year)。 service 启动文件: [Unit] Description=For Victoria-metrics-prod Service After=network.target [Service] ExecStart=/usr/local/bin/victoria-metrics-prod -httpListenAddr=0.0.0.0:8428 -storageDataPath=/data/victoria -retentionPeriod=3 [Install] WantedBy=multi-user.target
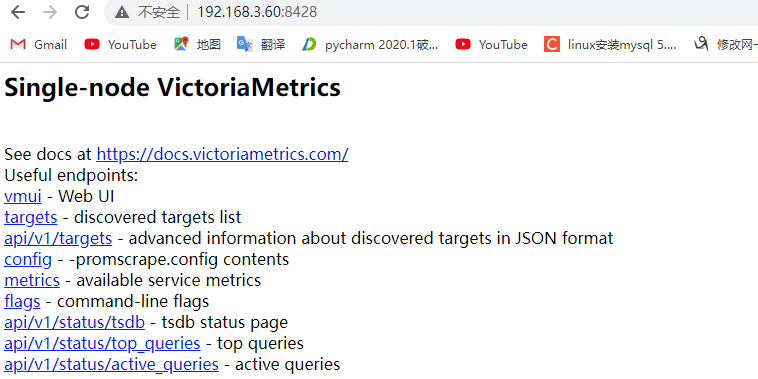
验证 web 页面:
8.2.1.2:prometheus 设置: 1 2 3 4 5 global: scrape_interval: 15s remote_write: - url: http://192.168.3.60:8428/api/v1/write
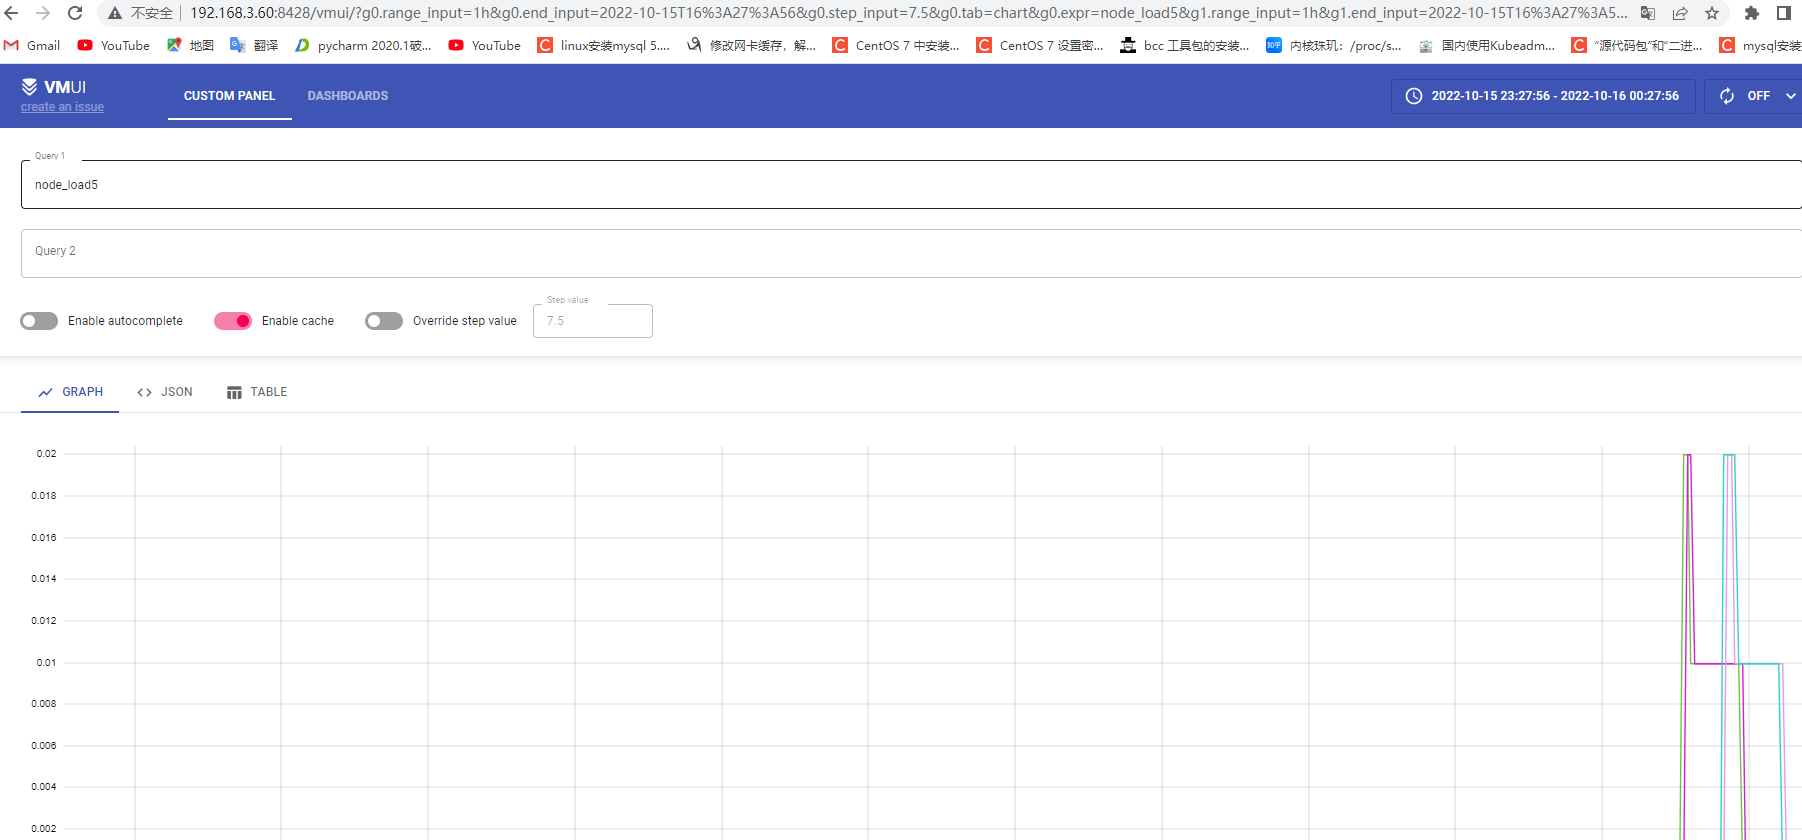
8.2.1.3:验证 VictoriaMetrics 数据:
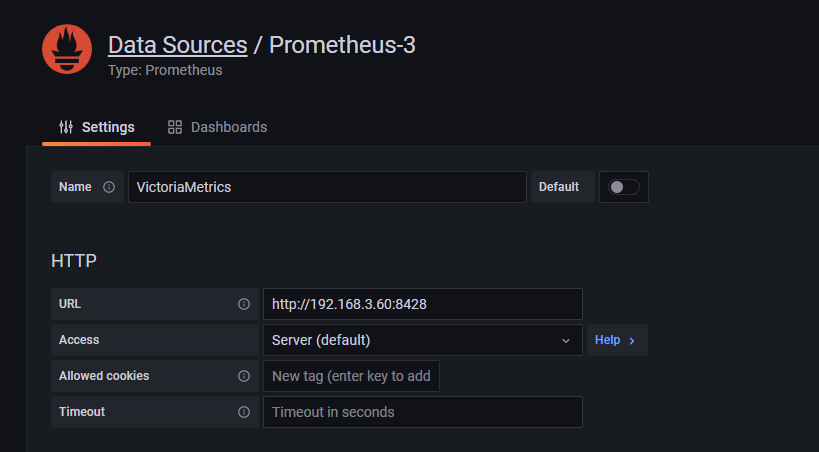
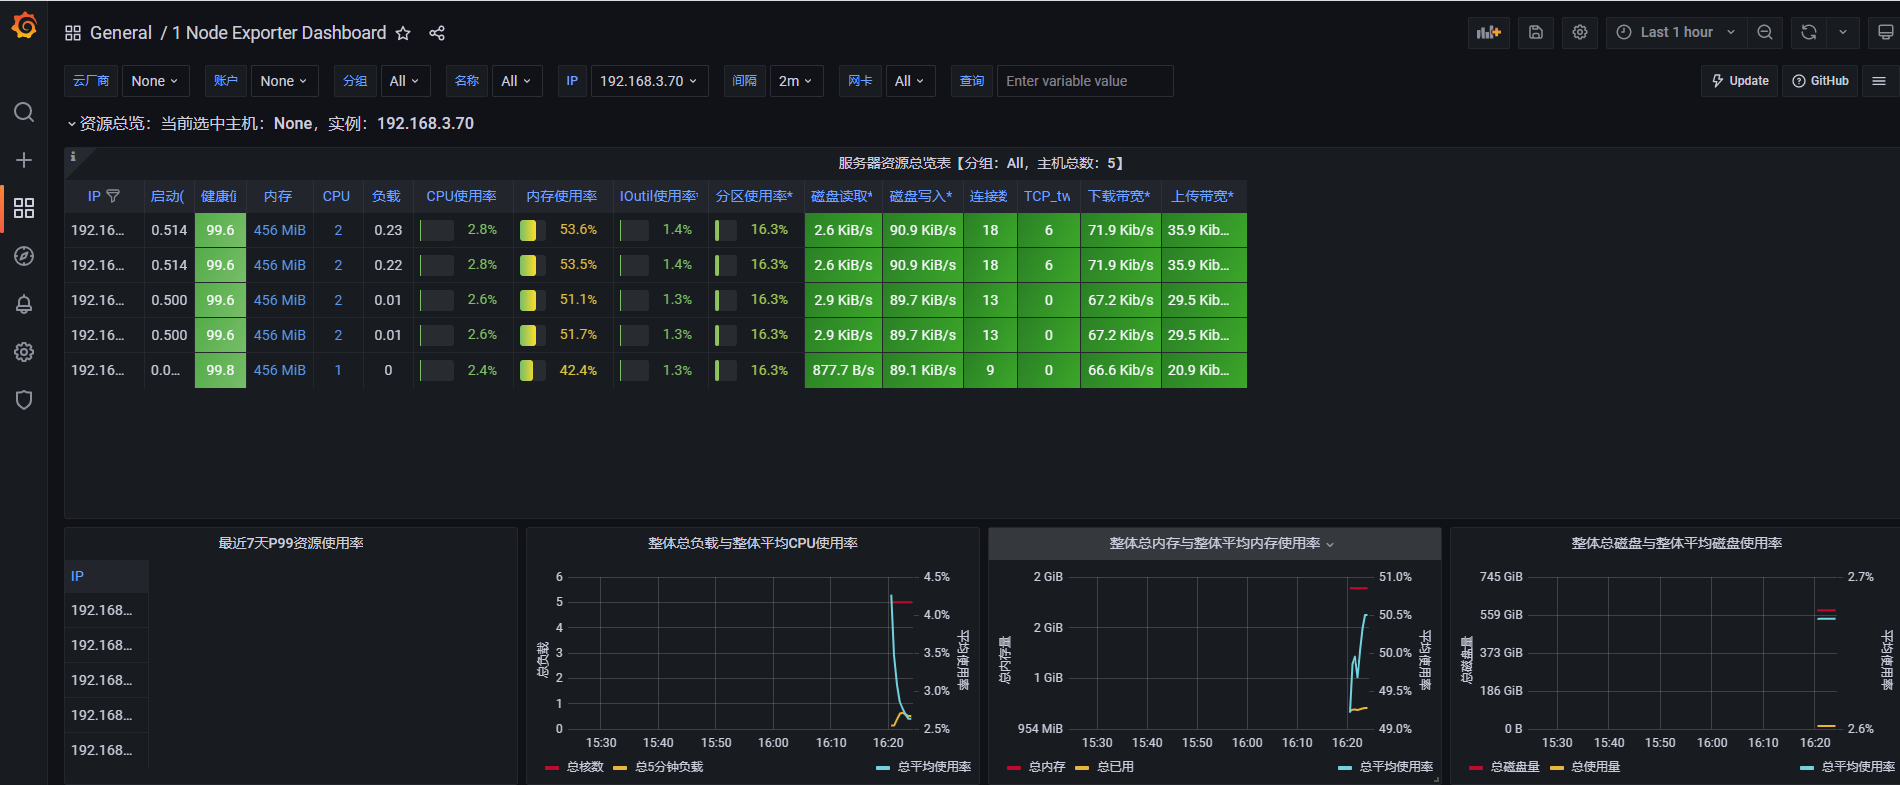
8.2.1.4:grafana 设置: 添加数据源:
类型为 prometheus,地址及端口为 VictoriaMetrics:
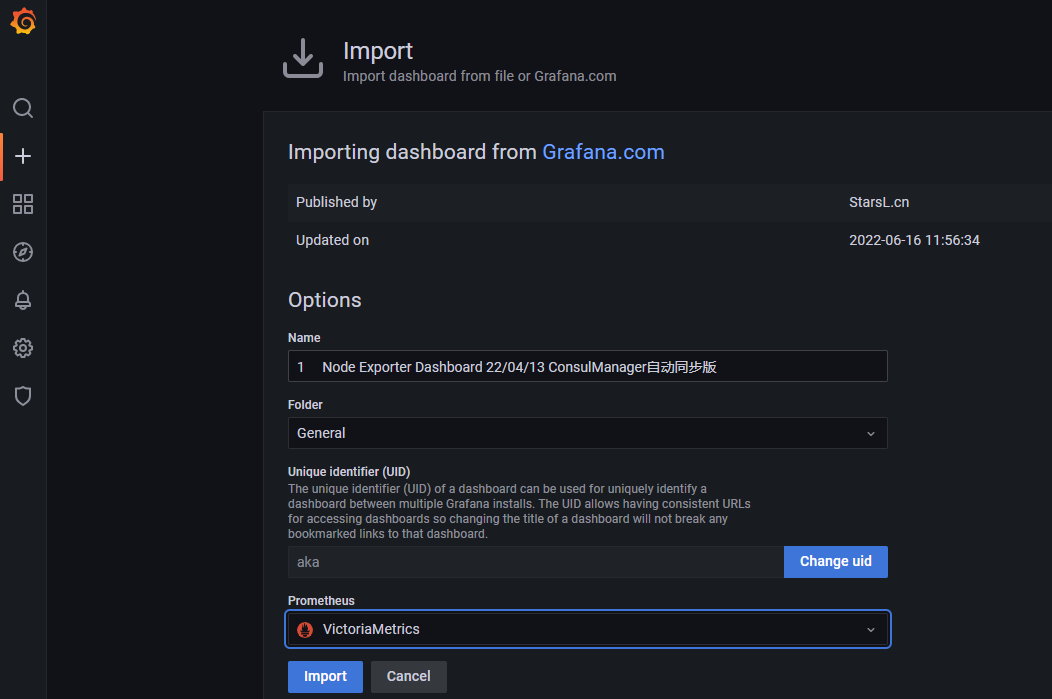
导入指定模板:
8919
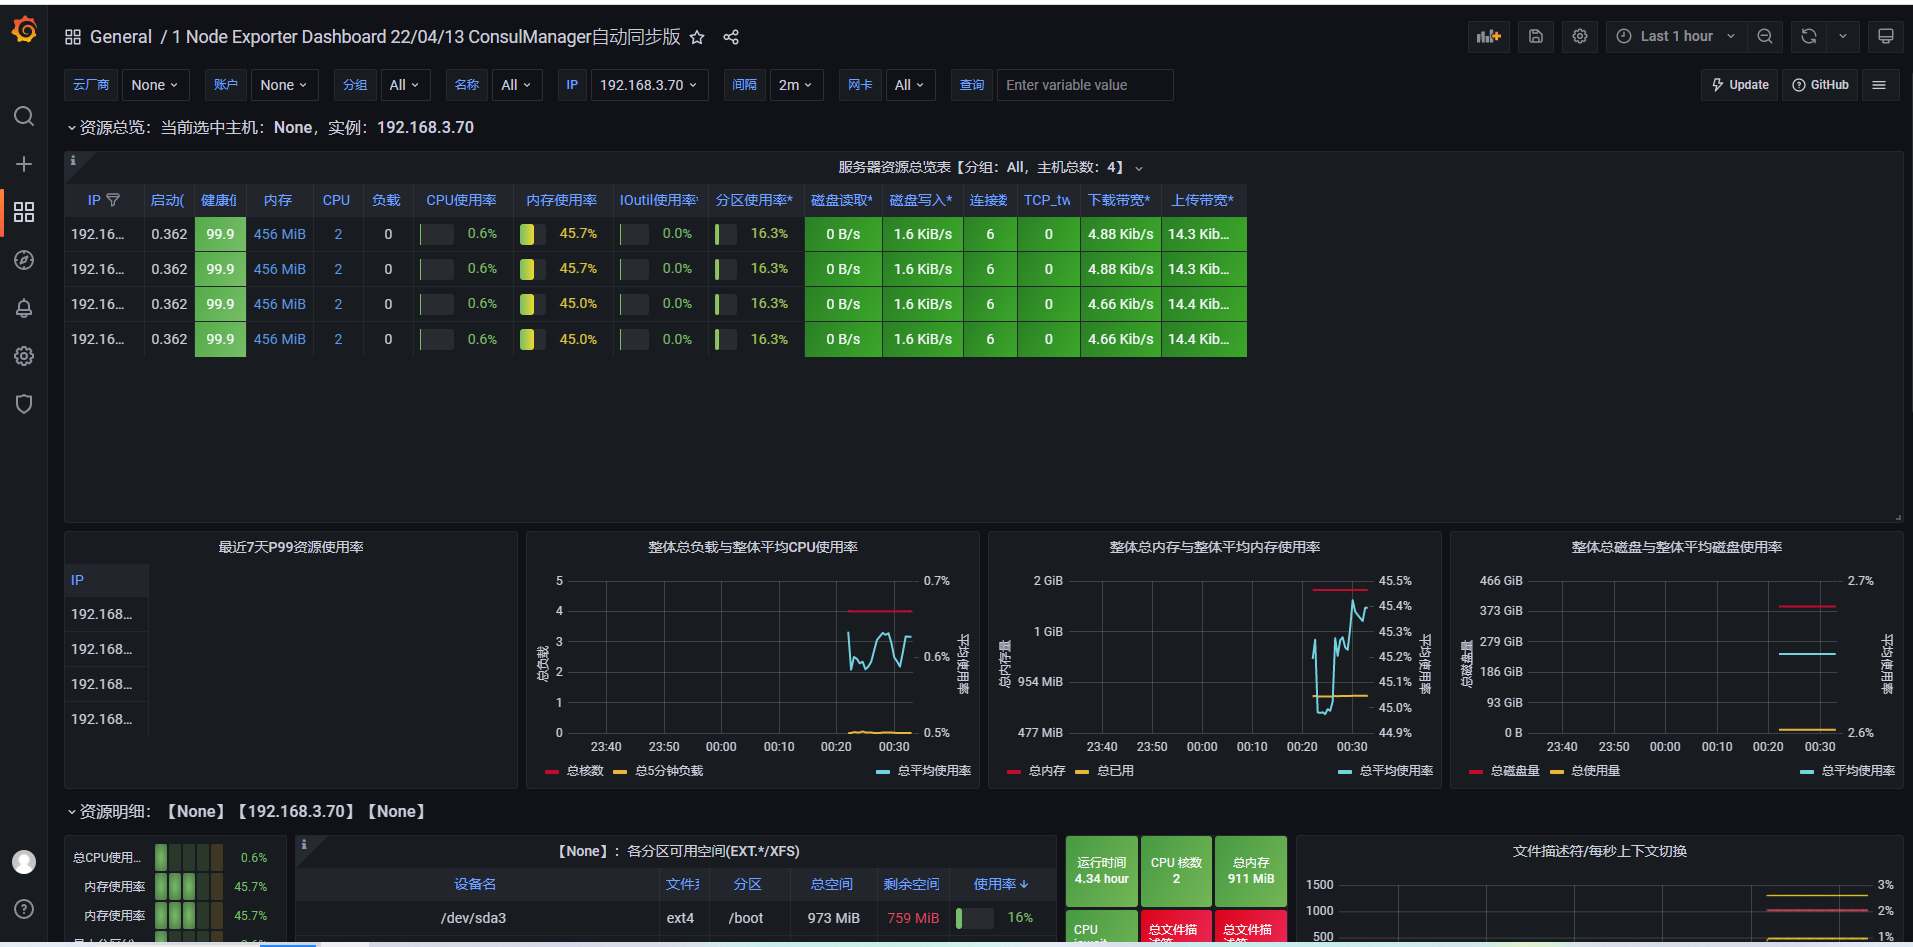
8.2.1.5:验证数据:
8.2.2:官方 docker-compsoe: https://github.com/VictoriaMetrics/VictoriaMetrics/tree/cluster/deployment/docker
1 2 3 4 5 6 7 8 9 10 11 12 13 14 15 16 17 18 19 20 21 22 23 24 25 total 2372 -rw-r--r-- 1 root root 12185 Oct 15 16:37 Makefile -rw-r--r-- 1 root root 10739 Oct 15 16:37 LICENSE -rw-r--r-- 1 root root 1007 Oct 15 16:37 CONTRIBUTING.md -rw-r--r-- 1 root root 10025 Oct 15 16:37 CODE_OF_CONDUCT_RU.md -rw-r--r-- 1 root root 3352 Oct 15 16:37 CODE_OF_CONDUCT.md -rw-r--r-- 1 root root 337 Oct 15 16:37 SECURITY.md -rw-r--r-- 1 root root 170145 Oct 15 16:37 README.md -rw-r--r-- 1 root root 1983704 Oct 15 16:37 VM_logo.zip drwxr-xr-x 15 root root 4096 Oct 15 16:37 app drwxr-xr-x 4 root root 4096 Oct 15 16:37 deployment drwxr-xr-x 2 root root 4096 Oct 15 16:37 dashboards -rw-r--r-- 1 root root 155168 Oct 15 16:37 go.sum -rw-r--r-- 1 root root 4733 Oct 15 16:37 go.mod -rw-r--r-- 1 root root 55 Oct 15 16:37 errcheck_excludes.txt drwxr-xr-x 7 root root 4096 Oct 15 16:37 docs drwxr-xr-x 3 root root 4096 Oct 15 16:37 snap drwxr-xr-x 3 root root 4096 Oct 15 16:37 ports drwxr-xr-x 5 root root 4096 Oct 15 16:37 package -rw-r--r-- 1 root root 15445 Oct 15 16:37 logo.png drwxr-xr-x 53 root root 4096 Oct 15 16:37 lib drwxr-xr-x 9 root root 4096 Oct 15 16:37 vendor
8.2.3:集群版部署:
8.2.3.1:组件介绍: 1 2 3 4 5 6 7 vminsert vmstorage vmselect 其它可选组件: vmagent 存储在 VictoriaMetrics 或任何其他支持远程写入协议的与 prometheus 兼容的存储系统中,有替代 prometheus server 的意向。
1 2 3 vmalert: 替换 prometheus server,以 VictoriaMetrics 为数据源,基于兼容 prometheus 的告警规则,判断数据是否异常,并将产生的通知发送给 alertermanager Vmgateway: 读写 VictoriaMetrics 数据的代理网关,可实现限速和访问控制等功能,目前为企业版组件 vmctl: VictoriaMetrics 的命令行工具,目前主要用于将 prometheus、opentsdb 等数据源的数据迁移到VictoriaMetrics。
下载:
8.2.3.2:部署集群: 分别在各个 VictoriaMetrics 服务器进行安装配置:
#8480-8482的监听端口负责http请求连接,8400-8401的端口是在vmstorage上,即vmstorage组件上有8400负责接收vminsert的数据持久化写请求,8401负责接收来自vmselect组件的查询请求,还有8482负责接收http请求,vmstorage组件上有三个端口,vmselect和vminsert上各有一个请求端口(8480和8481)。
1 2 3 4 5 6 7 8 9 10 vminsert-prod vmselect-prod vmstorage-prod 主要参数: -httpListenAddr string Address to listen for http connections (default ":8482" ) -vminsertAddr string TCP address to accept connections from vminsert services (default ":8400" ) -vmselectAddr string TCP address to accept connections from vmselect services (default ":8401" )
8.2.3.2.1:部署 vmstorage-prod 组件: 负责数据的持久化,监听端口:API 8482 ,数据写入端口:8400,数据读取端口:8401。
1 2 3 4 5 6 7 8 9 10 11 12 13 14 15 16 17 18 19 20 21 22 [Unit] Description=Vmstorage Server After=network.target [Service] Restart=on-failure WorkingDirectory=/tmp ExecStart=/usr/local/bin/vmstorage-prod -loggerTimezone Asia/Shanghai -storageDataPath /data/vmstorage-data -httpListenAddr :8482 -vminsertAddr :8400 -vmselectAddr :8401 [Install]WantedBy=multi-user.target 192.168.3.71:/etc/systemd/system/vmstorage.service 192.168.3.72:/etc/systemd/system/vmstorage.service 182: 183:
8.2.3.2.2:部署 vminsert-prod 组件: 接收外部的写请求,默认端口 8480。
1 2 3 4 5 6 7 8 9 10 11 12 13 14 [Unit] Description=Vminsert Server After=network.target [Service] Restart=on-failure WorkingDirectory=/tmp ExecStart=/usr/local/bin/vminsert-prod -httpListenAddr :8480 -storageNode=192.168.3.70:8400,192.168.3.71:8400,192.168.3.72:8400 [Install] WantedBy=multi-user.target
8.2.3.2.3:部署 vmselect-prod 组件: 负责接收外部的读请求,默认端口 8481。
1 2 3 4 5 6 7 8 9 10 11 12 13 14 15 16 17 18 19 [Unit] Description=Vminsert Server After=network.target [Service] Restart=on-failure WorkingDirectory=/tmp ExecStart=/usr/local/bin/vmselect-prod -httpListenAddr :8481 -storageNode=192.168.3.70:8401,192.168.3.71:8401,192.168.3.72:8401 [Install] WantedBy=multi-user.target 182: systemctl daemon-reload && systemctl restart vmselect && systemctl enable vmselect 183: systemctl daemon-reload && systemctl restart vmselect && systemctl enable vmselect
8.2.3.2.4:验证服务端口: 1 2 3 4 5 6 7 8 9 10 11 12 192.168.3.70: 192.168.3.71: curl http://192.168.3.71:8480/metrics curl http://192.168.3.71:8481/metrics curl http://192.168.3.71:8482/metrics 192.168.3.72: curl http://192.168.3.72:8480/metrics curl http://192.168.3.72:8481/metrics curl http://192.168.3.72:8482/metrics
8.2.3.4:prometheus 配置远程写入: 1 2 3 4 5 6 7 8 9 10 11 scrape_interval: 15s remote_write: - url: http://192.168.3.70:8480/insert/0/prometheus - url: http://192.168.3.71:8480/insert/0/prometheus - url: http://192.168.3.72:8480/insert/0/prometheus
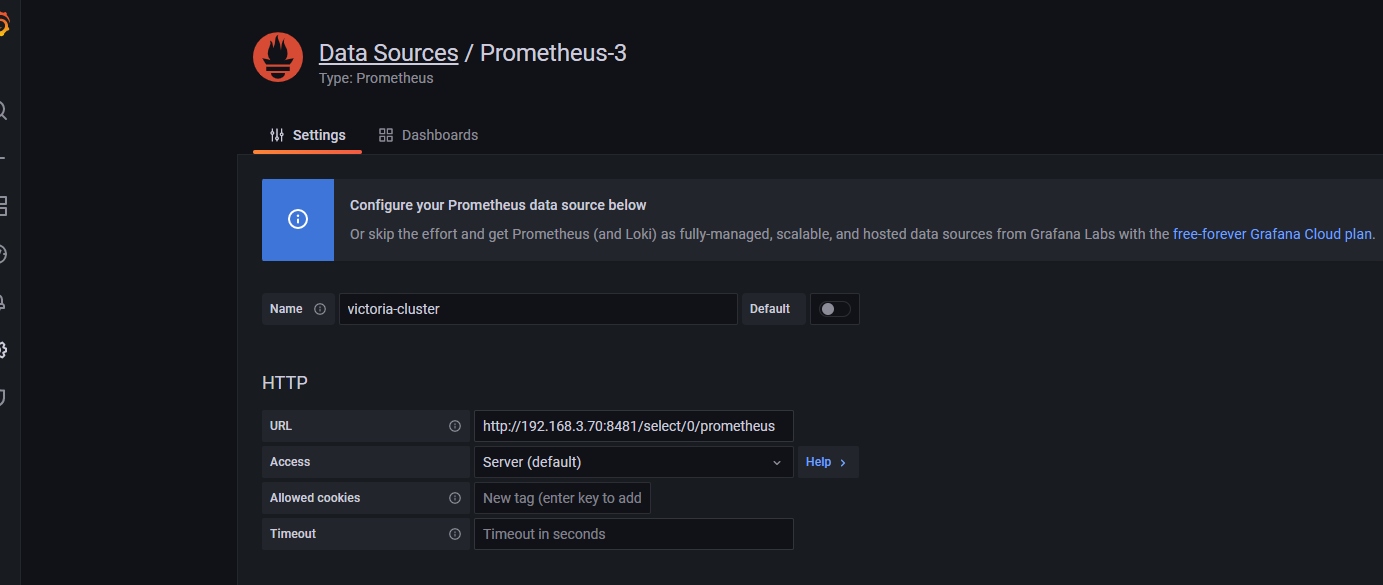
8.2.3.5:grafana 数据源配置: https://github.com/VictoriaMetrics/VictoriaMetrics#grafana-setup
8.2.3.6:添加数据源: http://192.168.3.70:8481/select/0/prometheus
导入指定模板:
8.2.4:开启数据复制: https://docs.victoriametrics.com/Cluster-VictoriaMetrics.html#replication-and-data-safety
